
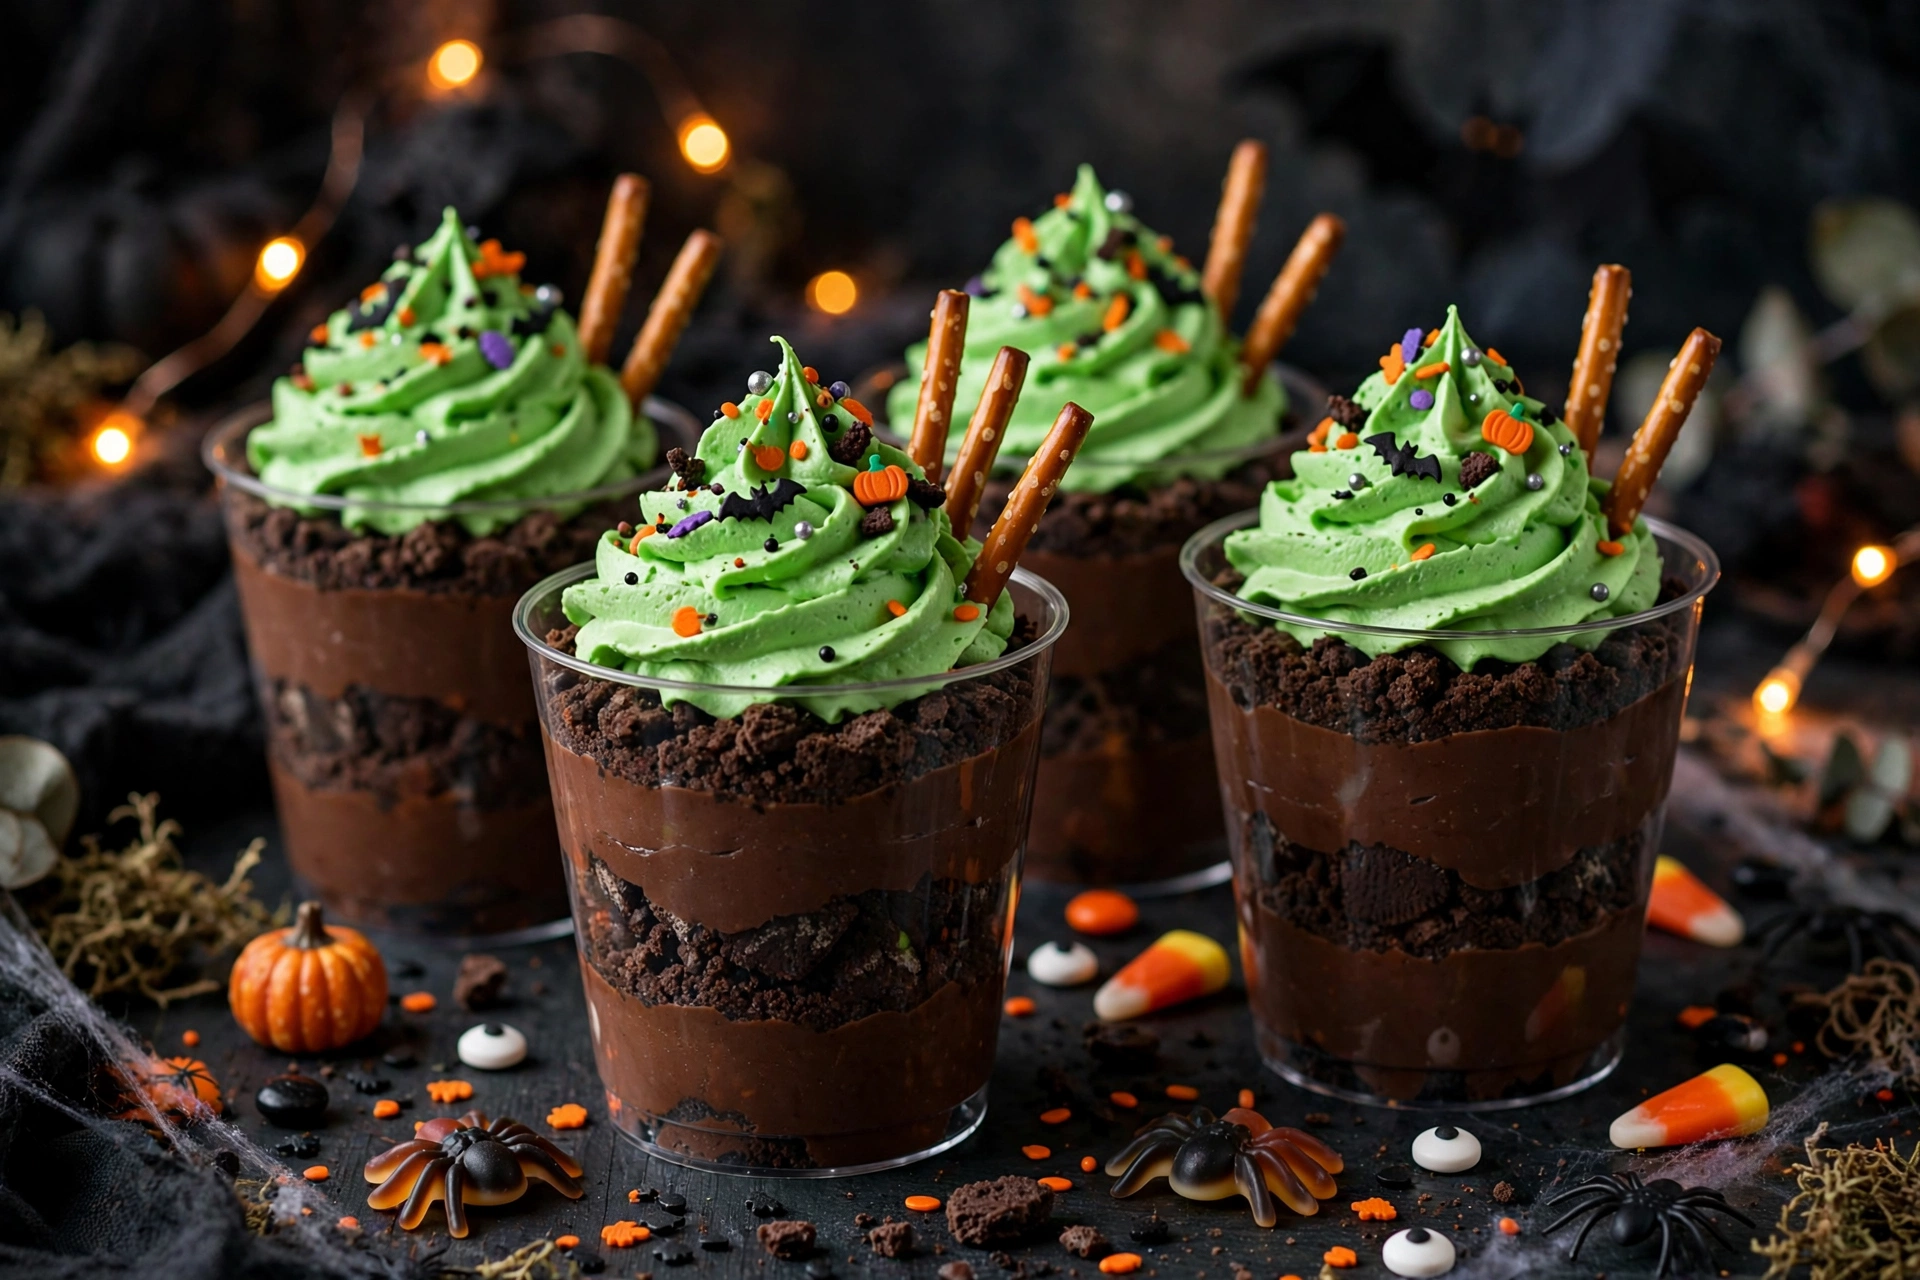
Some Halloween desserts look impressive and taste even better — and these Witch’s Cauldron Dirt Cups do both with zero baking. Layers of creamy chocolate pudding and crushed Oreo “dirt” hide inside clear cups, while a bubbling green potion topping, Halloween sprinkles and pretzel sticks turn each cup into a tiny witch’s cauldron. Kids love decorating their own, adults love how easy they are, and the whole thing comes together in about 15 minutes of actual work.
Set out the toppings bar-style and let everyone build their own cauldron — that is half the party.
Recipe at a Glance
Prep Time: 15 minutes | Chill Time: 30 minutes | Total Time: 45 minutes | Yield: 6 cups | Course: Desserts | Method: No-bake
Ingredients
- 1 box (3.9 ounces) instant chocolate pudding mix
- 2 cups cold milk
- 1 tub (8 ounces) whipped topping, thawed, divided
- 1 package chocolate sandwich cookies (such as Oreos), crushed
- Green food coloring, a few drops
- Halloween sprinkles, for decorating
- Pretzel sticks, for decorating
- 6 clear serving cups
Directions
- Whisk the instant chocolate pudding mix with the 2 cups of cold milk in a medium bowl for about 2 minutes, until the mixture thickens.
- Gently fold half of the thawed whipped topping into the pudding until smooth and creamy. Set the remaining whipped topping aside for the potion layer.
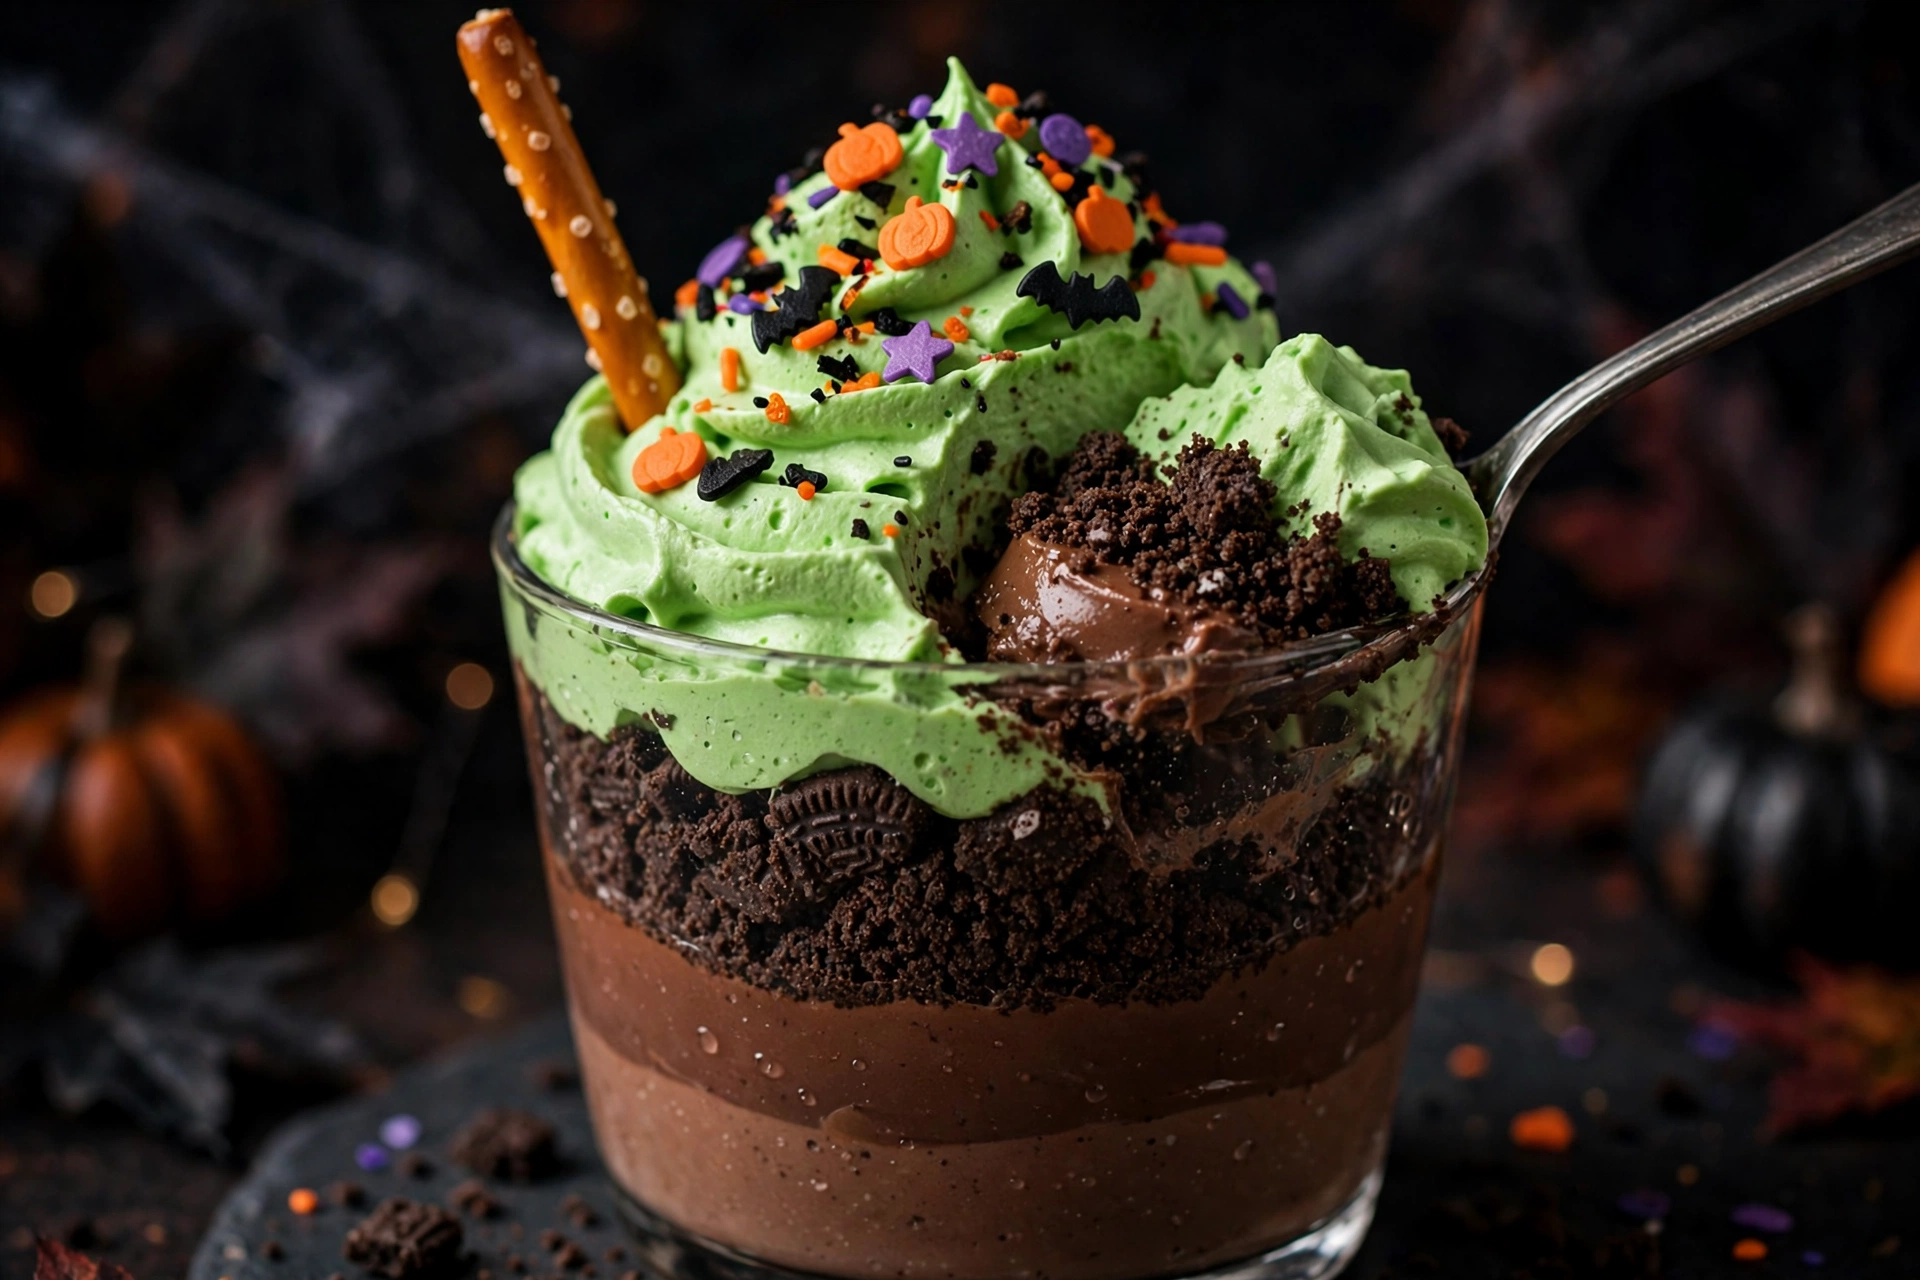
- Spoon a layer of the chocolate pudding mixture into each clear cup, then add a layer of crushed cookies. Repeat the layers, ending with a thick top layer of cookie “dirt.”
- Tint the remaining whipped topping with a few drops of green food coloring, stirring until the color is vibrant and even. Spoon or pipe it over the cookie layer so it looks like a bubbling cauldron potion.
- Finish each cup with Halloween sprinkles and a pretzel stick or two. Chill for 30 minutes so the layers set, then serve cold.
Why This Method Works
Three small choices make these cups taste as good as they look. First, folding whipped topping into the pudding (instead of just spooning plain pudding) gives a mousse-like lightness that keeps the dessert from feeling heavy after a big Halloween meal. Second, clear cups are not just for show — seeing the dark and light layers is what sells the “digging in the dirt” effect, and kids dig in with much more excitement when they can see what they are excavating. Third, tinting the topping green rather than the pudding keeps the potion color bright: chocolate would swallow the green, but white topping takes the color vividly and pipes into bubbly peaks that actually look like a brewing cauldron.
Dirt cups are the single-serve cousin of dirt cake, the classic American party dessert built from the same pudding, cookies and whipped topping — here just shrunk into individual cauldrons.
Pro Tips
- Crush, don’t pulverize: You want a mix of crumbs and small chunks for realistic “dirt.” A zip-top bag and a rolling pin give better texture than a food processor.
- Pipe the potion: A zip-top bag with the corner snipped makes swirly, bubbling peaks that look far more cauldron-like than a spooned blob.
- Chill before decorating: Let the layered cups chill first, then add sprinkles and pretzels just before serving so nothing goes soft.
- Keep the milk cold: Instant pudding only thickens properly with genuinely cold milk — warm milk gives a runny layer.
- Decorating station: Put out extra sprinkles, candy eyes and gummy worms and let kids finish their own cups.
Storage and Make-Ahead
Covered cups keep in the refrigerator for up to 3 days — the pudding layers actually taste better the next day once the cookie crumbs soften slightly. Add sprinkles and pretzel sticks just before serving so they stay crisp. Do not freeze these cups: thawed whipped topping turns watery and the cookie layers go soggy. You can layer the cups a full day ahead and keep them covered in the fridge, then add the green potion topping and decorations on party day.
Substitutions and Variations
- Gluten-free: Use gluten-free chocolate sandwich cookies and check that your pudding mix is certified gluten-free.
- Dairy-free: Use a non-dairy whipped topping and soy milk — note that instant pudding does not always set with almond or oat milk, so soy is the safer swap.
- Extra spooky: Add gummy worms crawling out of the “dirt” or a candy eyeball or two on top of the potion.
- Vanilla cauldron: Swap in vanilla pudding and tint it purple or orange for a different potion color.
More Halloween Treats to Try
If cauldron desserts are your thing, you will love our Monster Mash Brownies, our Grandma Aggie’s Halloween Cookies, and our Spooky Pumpkin Whoopie Pies.
Frequently Asked Questions
Can I make dirt cups ahead of time? Yes — layer the pudding and cookies up to a day ahead and refrigerate covered. Add the green potion topping, sprinkles and pretzels just before serving.
Do I need special cauldron cups? No. Any clear cup, small jar or plastic tumbler works — the clear sides are what show off the layers.
Why is my pudding runny? The milk was probably not cold enough, or the pudding was not whisked the full 2 minutes. Chill the bowl and milk first, whisk until thick, and give the cups their 30-minute chill.
Can kids decorate their own cups? That is the best way to serve them. Set out sprinkles, gummy worms and pretzel sticks and let each child finish their own cauldron.
How long do leftovers last? Covered in the fridge, up to 3 days — but the pretzels and sprinkles soften, so add fresh decorations to any second-day serving.
So grab a spoon, stir up a little potion, and let everyone dig into their own cauldron — Halloween dessert does not get easier than this.
Rate this recipe
Be the first to rate it!
3 thoughts on “Witch’s Cauldron Dirt Cups”